At Percona Live Europe 2018 in Frankfurt, our colleagues Calin Don and Flavius Mecea presented the secrets of automating MySQL deployments on Kubernetes, in the context of enterprise WordPress setups.
#The Context
The myth that containers aren’t ready for databases still persists, but we’re not buying it. Kubernetes is DB-friendly if seasoned with the right tools, so we built an open-sourced the MySQL Operator for Kubernetes to solve this problem.
Why Kubernetes?
- It’s an ubiquitous technology
- It’s open-source
- It’s at the core of our Stack.
#The need
We operate with lots of small to medium-sized databases in a database-per-service model, as we call it. The workloads
To sum up, we were looking for an operator that could provide:
- Easy MySQL cluster deployment in Kubernetes
- Scalable MySQL cluster*
- High availability for MySQL
- Automated backups & restores
- Build-in monitoring.
The available ones were doing synchronous replication using MySQL group replication or Galera-based replication so, as great engineers do, we decided to write our own operator.
#The solution
We designed our own Kubernetes Operator for managing MySQL Clusters with asynchronous or semi-synchronous replication, which provides:
- Self-healing clusters
- Highly available reads
- Virtually highly available writes
- Replication lag detection and mitigation
- Resource abuse control
- Automated backups and restores.
Our MySQL operator is based on Percona Server for MySQL for its operational improvements — like utility user and backup locks — and is based on the tried and tested Orchestrator to perform automatic failovers.
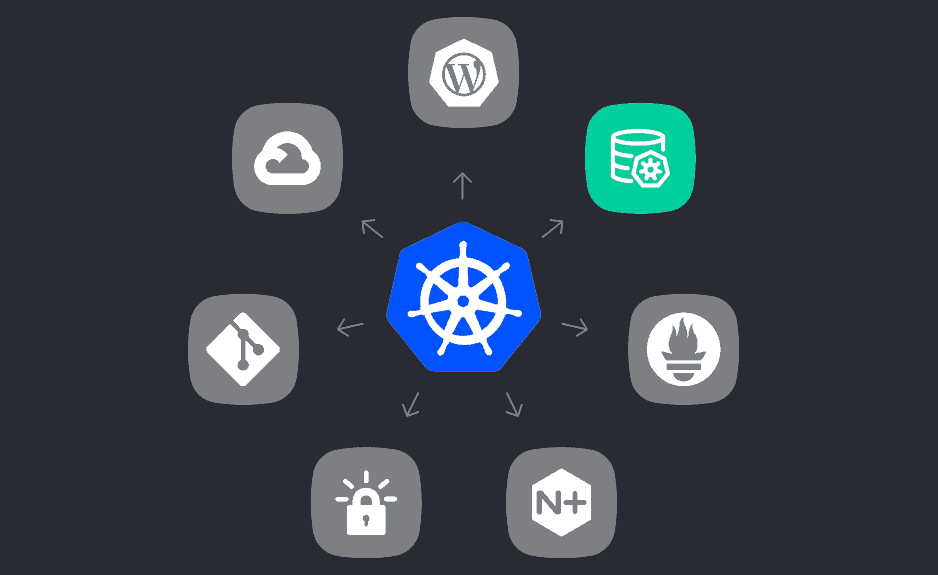
The operator plays a central role in the Presslabs Stack for open WordPress hosting infrastructure. We plan to further develop the MySQL Operator and integrate it with Percona Management & Monitoring while working to make sure that the data is safely stored. We are also looking for community feedback on the operations that MySQL Operator automates.
#How it’s made
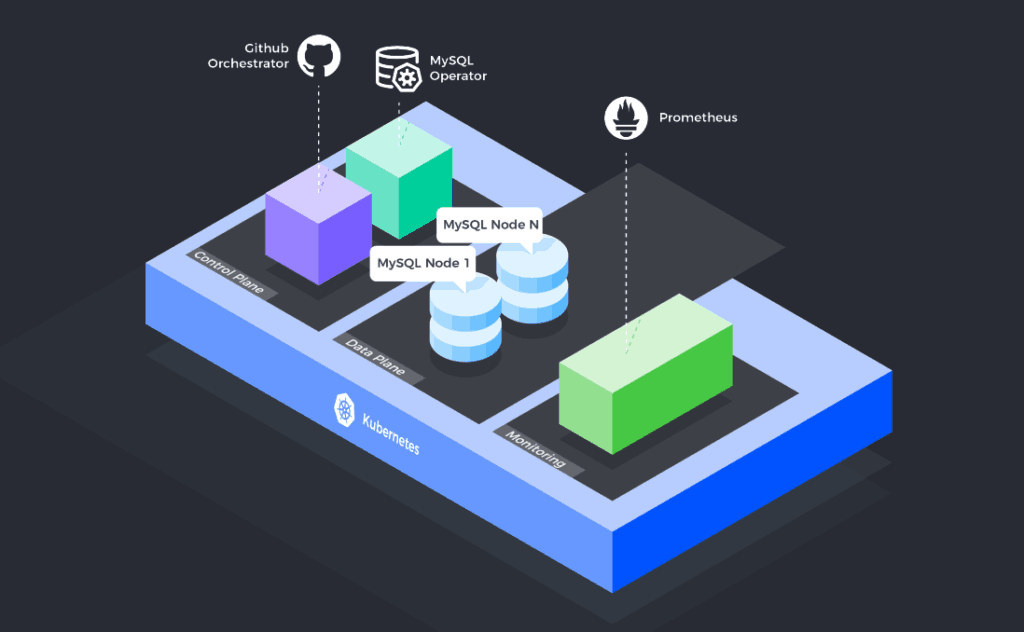
The main reason behind our preference for Percona’s MySQL is because Percona is battle-tested in Enterprise environments. Moreover, it provides a lot of features and utilities for MySQL such as:
- Percona XtraBackup
- Percona Toolkit
- Percona server for MySQL
- Percona Monitoring and Management.
#Use cases
Some use cases for our MySQL operator may be:
- Microservices: usually, every microservice has its own database deployed in its own MySQL cluster. Using the operator in deploying small databases for microservices is simple.
- Ephemeral databases for testing: when testing usually you need a database where to run your stuff; it doesn’t have to last for long and you want that database to be always initialized, with a known state (from a backup).
- On-premise DBaaS: You can use the MySQL Operator to set up your own Cloud database for storage on your own premises. Our operator takes care of configuring, maintaining, and upgrading your databases, as well as taking backups and keeping the cluster highly available. Agriterra and Platform9 for example, are using the MySQL operator for such purposes.
#Outcomes: cost and performance
To highlight the outcome of using the operator we choose to put to test a cluster deployed by MySQL Operator and a Google Cloud SQL instance. The cost for a Kubernetes node is almost the same as for a Google Cloud SQL cluster.
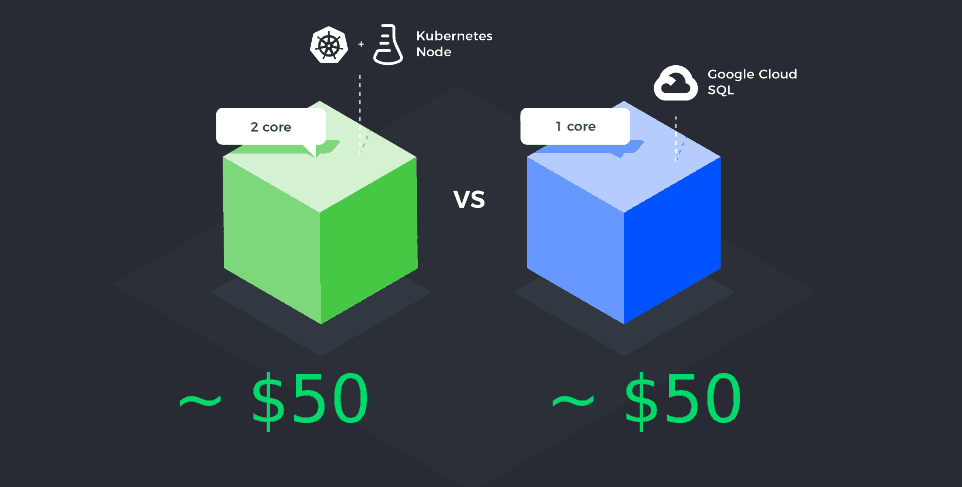
We analyzed our clients’ databases and determined that on average, medium sites have a database with 35 tables and 200.000 rows per table. The next step was to set up a synthetic benchmark with those parameters and run it against both clusters.
Before analyzing the results, we estimate, based on the metrics we collected from our clients, that we need a throughput of 100 queries per second (QPS) for a cluster. This estimation covers 99% of the cases of WordPress sites that we host.
In other words, we need at most 100 QPS per cluster. Everything that’s above this throughput is a waste of resources because the extra resources in 99% of the cases are not needed.
The result for a MySQL cluster that runs on a Kubernetes node is more than 4000 QPS. While the same configuration we tested on Google Cloud SQL cluster performs around 3000 QPS. Both can handle more queries than needed.
So we tried to optimize the resource consumption by adding more instances on a single Kubernetes node and run the benchmarks again, concurrently.
As you can see in the figure below, the performance decreases, but it was still more throughput than necessary.
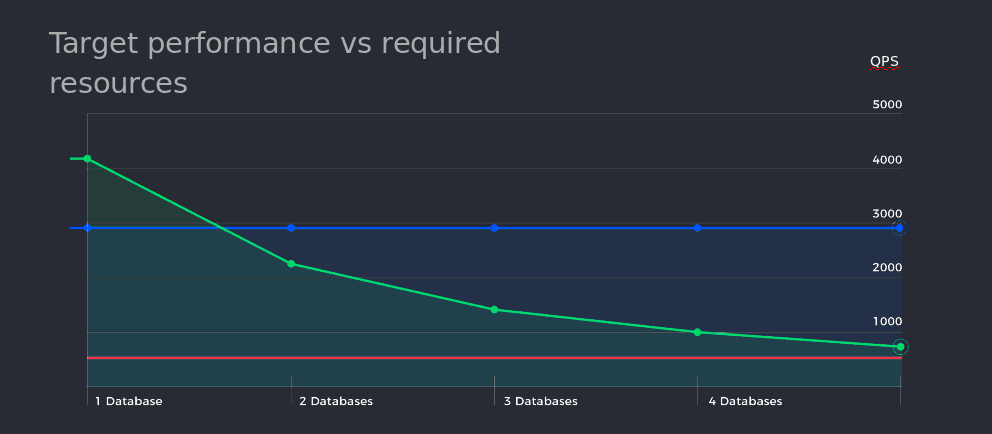
We added one more, and one more; and finally managed to squeeze in up to 5 clusters on a single Kubernetes node, and acquire a throughput still higher than necessary, around 1000 QPS for 5
Using a Google SQL instance cost us $50/ month, but scaling it up to 5 clusters resulted in a total of $250/
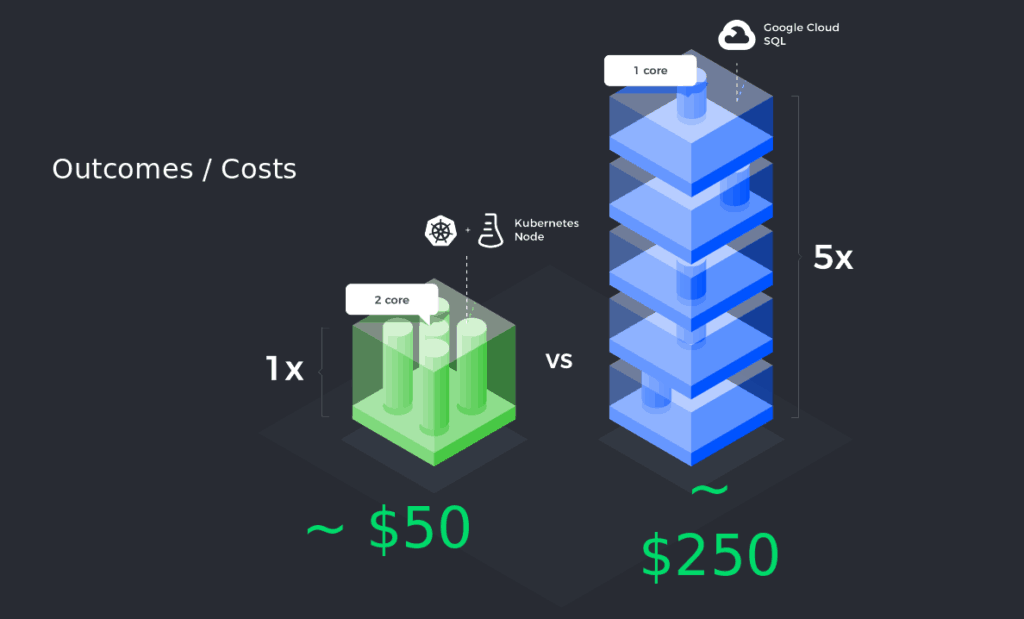
That means, for the same amount of money used for a single Google SQL instance, on a Kubernetes node we deployed 5 clusters that handled our workloads just fine.
RESULT: You
“In a cloud-native world, room to grow is wasted money“, Calin Don, CTO Presslabs
#Demo
Let’s see how can be the MySQL Operator used in a short demo.
#1. Install the MySQL Operator
Let’s start with installing the MySQL Operator. We use helm to deploy it. First, we need to add our chart repository to your helm.
Then, by typing “helm install”, the chart name and a release name will install the operator in your cluster.
$ helm repo add presslabs https://presslabs.github.io/charts

$ helm install presslabs/mysql-operator --name mysql-operator#2. Create a cluster
Having an installed operator now we can create a cluster. Just open your favorite editor and define using yaml a Kubernetes secret that contains cluster credentials and a MySQL Cluster object where to specify cluster details like replicas and so on. After that you can apply the file kubectl.
Cluster.yaml

apiVersion: v1
kind: Secret
metadata:
  name: test-secret
type: Opaque
data:
  ROOT_PASSWORD: bm90LXNvLXNlY3VyZQ==
  # USER: <your app user base64 encoded>
  # PASSWORD: <your app password base64 encoded>
  # DATABASE: <your app database base64 encoded>

apiVersion: mysql.presslabs.org/v1alpha1
kind: MysqlCluster
metadata:
  name: test
spec:
  replicas: 1
  secretName: test-secret
Then, by using kubectl you can see the created pods of the cluster. Also, you can check the orchestrator for existing clusters.
$ kubectl apply -f cluster.yaml
secret/test-secret created
mysqlcluster.mysql.presslabs.org/test created
$ kubectl get pods
NAME				READY	STATUS	RESTARTS	AGE
test-mysql-0			4/4	Running	2		4m

Also, with kubectl you can see the cluster status, you can see if the cluster is ready or not, how many nodes are ready, which is the master node, if it’s lagged or not, if is replicating or not and more.
$kubectl describe mysql cluster test

Status:
  Conditions:
    Status:            	True
    Type:              	Ready
  Ready Nodes:           	1
  Nodes:
    Name:                	test-mysql-0.test-mysql-nodes.default
    Conditions:
      - Type:              	Lagged
        Status:            	Unknown
      - Type:             	Replicating
        Status:            	False
      - Type:             	Master
        Status:           	True
      - Type:             	ReadOnly
        Status:            	False
#3. Connect to the cluster
It’s important to know that the operator creates two services:
- one for writes, that points to the master node
- one for reads, that points to the replicas nodes.
We can connect to the cluster in multiple ways, one of them is to port-forward the master service on your machine.
Using a simple MySQL command you can connect to it and run any query that you want.
$ kubectl port-forward svc/test-mysql-master 3306 &
Forwarding from 127.0.0.1:3306 -> 3306
Forwarding from [::1]:3306 -> 3306
$ mysql --host=localhost -u app-user -papp-password
If you don’t see a command prompt, try pressing enter.
mysql> SELECT @@hostname;
+--------------+
| @@hostname   |
+--------------+
| test-mysql-0 |
+--------------+
1 row in set (0.01 sec)
#4. Scale up
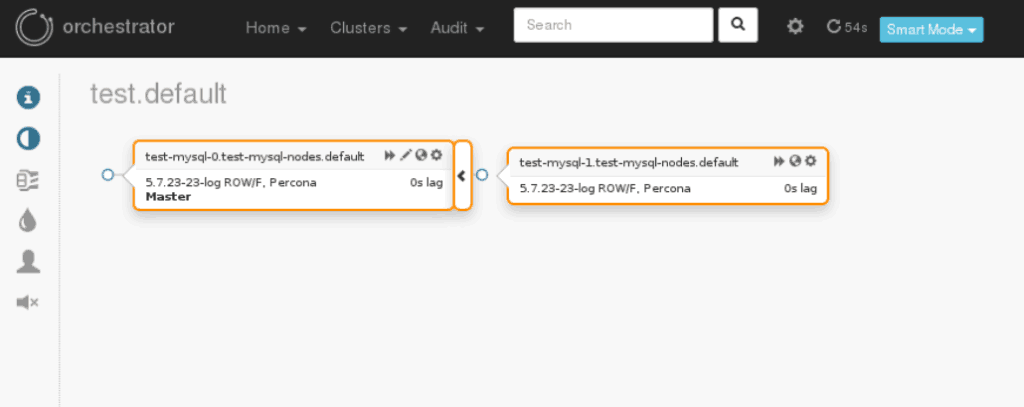
We talked about scalable MySQL, and scalability is a piece of cake, just modify the MySQL Cluster resource replicas to 2.
cluster.yaml

apiVersion: mysql.presslabs.org/v1alpha1
kind: MysqlCluster
metadata:
  name: test
spec:
  replicas: 2
  secretName: test-secret
Voilà! We can see a new replica in the Orchestrator.
We have written detailed, step-by-step tutorials for how to set up a MySQL Cluster on Microsoft Azure, Google Cloud Platform, AWS and Digital Ocean, as well as a round up to sum up our conclusions.
#Future plans
- Logical mysqldump backups for easier data portability so you can make a simple SQL file and import it to other databases as well
- Point in Time backup and restore to automatically restore cluster to a previous state, at a certain date in time
- Integrate Percona Management and Monitoring for easy debugging your cluster performance with your application
- Kubernetes Service Catalog integration to simplify the jobs of all the folks running on-premise DBaaS
- Proxy SQL integration as we want to use it for better load balancing.
- Vault integration for improved security
- Data encryption at rest
- Add a GUI for easier management.
If you want to find out more about this topic, check this article about our Kubernetes journey, from research to production.
