Few things are more damaging to your workflow than encountering a big error. WordPress does a great job keeping things smooth and secure, but when you’re uploading a group of files and suddenly see an HTTP error or a broken image icon, get ready to kiss your productivity goodbye.
The good news is that the WordPress HTTP error that occurs when uploading images or videos doesn’t have to spell the end of your workday. Below we’ll discuss the potential origins of this error along with a few quick fixes that can help get you and your website back on track.
#Overview of the WordPress HTTP Upload Error
The WordPress HTTP error mostly happens when something goes wrong with the image or video upload dialog. The built-in media library tool normally handles single and bulk uploads with ease, but from time to time a problem sneaks in and makes a mess of things.
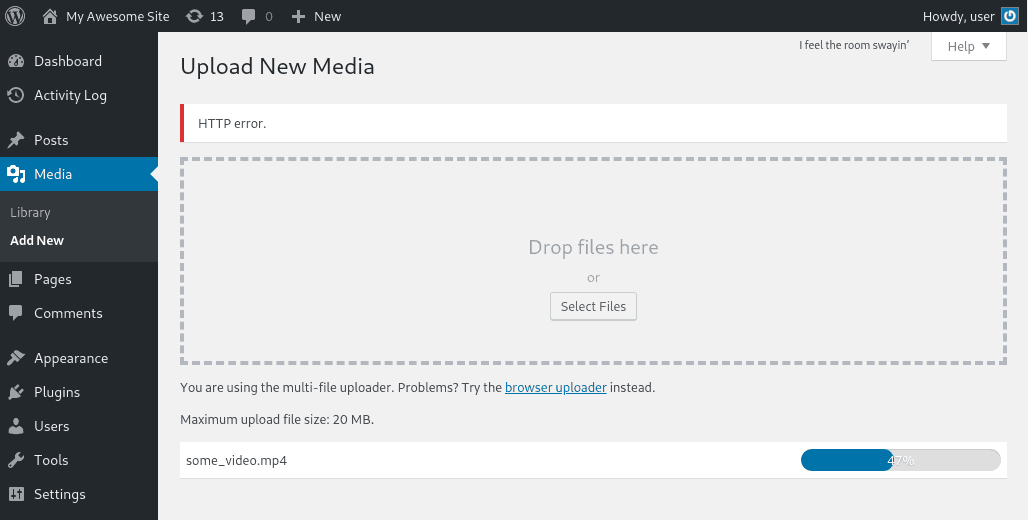
When the error occurs, WordPress spits out an extremely unhelpful generic message. The uploading issue could be caused by a number of factors, most of which are indistinguishable from WordPress’ perspective. As an end-user, it’s up to you to diagnose the problem and dig down to the solution. Fortunately, that’s not as difficult as you might think.
There are two broad possibilities to consider as the source of the HTTP issue: client-side errors, and hosting errors. The former could be related to your login session, bad characters in your image filename, or even temporarily unstable internet connection. The latter usually comes down to plugin problems, issues with host resources, and similar snafus.
#How to Fix the WordPress HTTP Error
Correcting the WordPress HTTP error might not be as complicated as you’re expecting. The most common causes of the error are local issues you can fix in a matter of seconds. Below we’ll cover the best solutions you can try out, starting with the fastest and easiest.
#Refresh the Page
When encountering the WordPress HTTP error for the first time, you might be able to fix things in a matter of moments. As soon as the error shows up, all you need to do is to refresh the page. Press the reload button on your browser or hit the ‘F5’ key. This will allow you to upload the image again, and in all likelihood, it will work this time.
Refreshing the page often fixes HTTP errors caused by temporary internet problems, expired login sessions, and other simple hiccups. WordPress has a hard time recognizing these as real issues while in the middle of uploading a file, which is why you receive a generic message instead of a specific error code.
#Upload a Smaller File
The longer WordPress spends uploading a piece of content, the greater the chances something can go wrong. Images are usually only a couple of MB in size, but videos can weigh in at hundreds of MB and take full minutes to upload. This opens the door to plenty of opportunities for minor internet errors or login expirations, resulting in that dreaded HTTP error message.
To get around this problem, try decreasing the size of your content. If it’s an image, you can resize it or try an image optimization service to reduce the overall file size. Videos are a little more difficult to trim down, but with the right editing software you can often shave a few MB off by reducing the quality or dimensions, all without harming the end product.
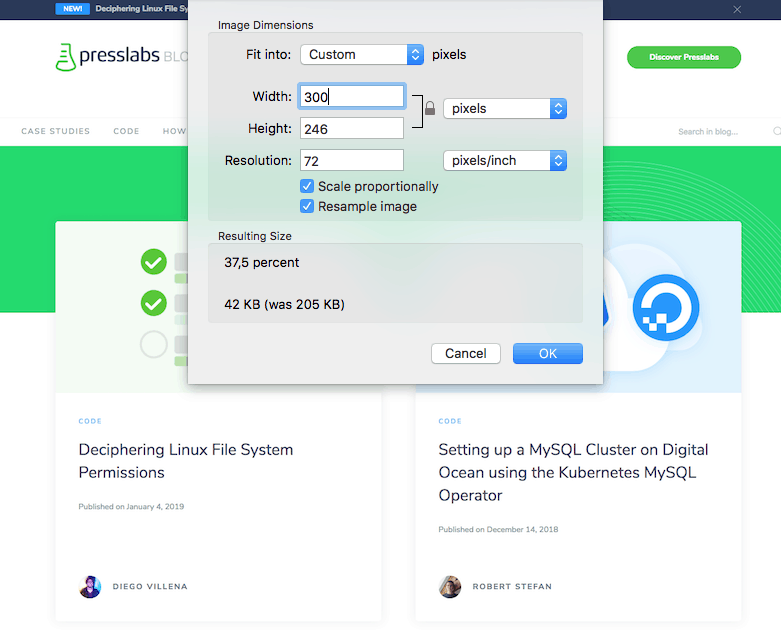
In general, you’ll want to keep your images around 100-300 KB in size. PNG and JPG file types usually offer the best quality to size ratio, as well. If you simply can’t reduce the upload size all that much, try uploading a smaller file to see if the error persists. If it doesn’t, switch to an FTP program and manually add your content that way.
#Rename the Image File
This is one of those errors that makes you want to slap your forehead. Special characters in file names can sometimes give WordPress problems, as do files with identical names. You can’t manually edit this data once it has been uploaded, so instead, you’ll need to rename the content on your device and try uploading it again.
It’s a good idea to get into the habit of automatically adding sequential numbers to the end of image files, just to avoid this situation. Anything other than letters, numbers, and dashes should also be avoided, as these can unexpectedly break your site or cause upload errors.
#Disable the Fancy Uploader
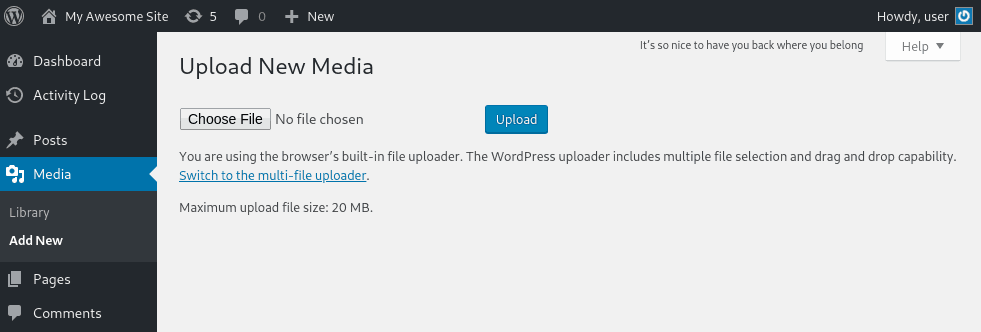
WordPress comes with a fancy multi-file uploader that handles content with ease. In certain cases, though, it can cause the HTTP error when adding new images or videos to your site. Before trying more complicated fixes, go to your WordPress dashboard and navigate to Media > Add New. Below the uploads box is a link marked “Try the browser uploader instead.”. Click this and try the simplified uploader to see if that fixes the problem.
#Deactivate Plugins
Once you’ve tried all the local solutions, it’s time to get serious about it. If none of the above fixes your HTTP error issue, head to the WordPress dashboard and start disabling plugins. Do this with everything that’s active, even plugins that seemingly have nothing to do with uploading media.
Once they’re turned off, go back to the dialog and try uploading the file again. Did it work? Great! Now activate a single plugin and try the upload again. Repeat this process until you find the plugin that causes the upload issue. In most cases, it’s a single extension. Leave it disabled moving forward, then dive into the creator’s support documentation to see if you can root out what’s causing the errors.
We offer free development sites for all our customers, so you can test plugins without running the risk of breaking something on your site. Find out more about the benefits of having dev sites.
#Try the ‘Add From Server’ Plugin
If you need a quick temporary fix to the WordPress HTTP error, the ‘Add From Server’ plugin might be just what you need. It gives you the ability to upload larger files without running into hosting limitations or other minor errors. Think of it as an escort for big pieces of data.
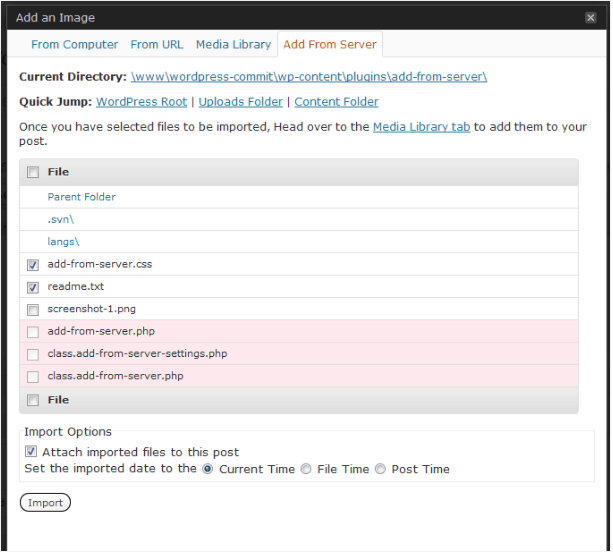
Note that ‘Add From Server’ should be used as a temporary solution only. It does not fix the HTTP upload error, nor does it replace the WordPress media upload dialog. Furthermore, the plugin no longer receives support or updates, meaning it won’t function as intended forever.
#Check File and Directory Permissions
Files and folders hosted on remote servers all have associated permissions. These determine what can be done with a piece of content, allowing or denying actions such as execution, deletion, or modification. If a permission is set incorrectly, it could forbid WordPress from making changes to certain directories, causing an immediate HTTP error. Find out more about this subject on our article about deciphering Linux file system permissions.
Most file permissions for WordPress should be set at 755, which allows the CMS to add new content to a directory with ease. You can check the current permissions by opening an FTP program and navigating to the WordPress ‘Uploads’ directory and checking the folder’s attributes. If it’s not set to 755 (see below for details on what that is), set the changes, make sure it applies to directories only and recurses into subdirectories, save everything, then try the media upload a second time.
- Owner – Read, Write, Execute (7)
- Group – Read, Execute (5)
- Public – Read, Execute (5)
#Update Your PHP Version
WordPress currently recommends at least PHP 7.2 or higher. If you haven’t kept your server up to date, you may be as far back as version 5.6, far below the minimum requirements for smooth operation. You can quickly change this by going to your host’s cPanel and updating to the latest release. At Presslabs, we take care of keeping the PHP versions of the sites updated; you can read more about it in our PHP specifications.
#Fix Imagick on Shared Hosts
If you’re running WordPress on a shared hosting plan, you could be having your resources throttled. This is a common practice for shared and free hosts, and unfortunately, it’s difficult to diagnose due to limited server access.
Imagick is a PHP module WordPress uses for processing images. If your shared host is using this, and throttling takes place, you might encounter the HTTP upload error. To fix this, all you have to do is go to your .htaccess file and make a quick addition. At the very top of the content, simply plug in the following line, exactly as you see it below:
- MAGICK_THREAD_LIMIT 1
This should correct your WordPress upload issues right away. If it doesn’t, the sad fact is you might need to move to a new host or upgrade to a dedicated hosting plan.
We offer the possibility to quickly switch between the two image processing libraries GD and ImageMagick, find out more in our image library settings page.
#Remove Custom Media Library Paths
There’s a slight chance the HTTP upload error is caused by a media path which is out of place. This can happen if you migrated your WordPress site from another host, or if you made changes during the installation process and forgot to set them right afterward.
WordPress expects its media folder to reside in /wp-content/uploads, usually further broken down into month-and year-based folders. If this isn’t the case, the CMS may have trouble figuring out where to store content.
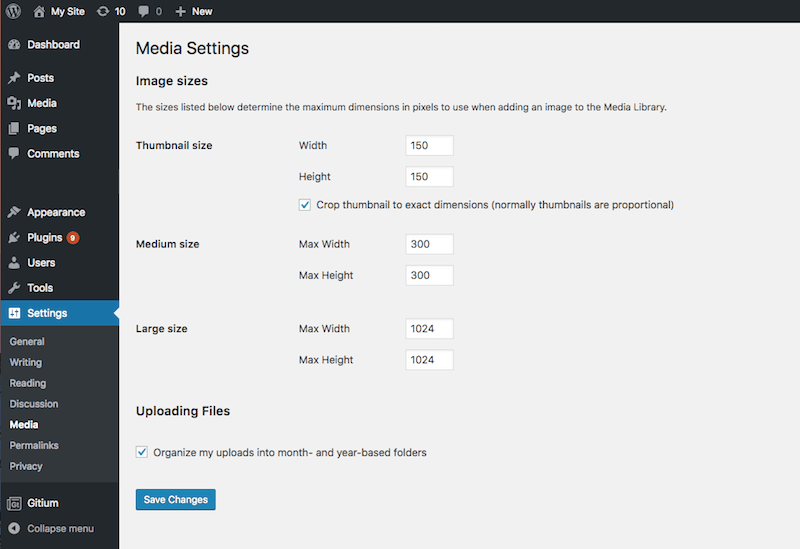
This one is a pretty easy fix. Go to your WordPress dashboard and click on Settings > Media. If a box appears that shows a directory for your media storage, all you have to do is delete it, then save the changes. WordPress will automatically revert to the default directory on its own.
#Disable mod_security
Mod_security is a firewall that some servers run to add a layer of security to hosted websites. Sometimes this simple feature can cause problems with the WordPress upload dialog. If the solutions above have failed, open your FTP program and add the following to the top of your .htaccess file:
<IfModule mod_security.c>
SecFilterEngine Off
SecFilterScanPOST Off
</IfModule>
The above will disable mod_security on your server and allow uploads to proceed without being accidentally blocked.
#Increase Memory Limits
If you’re running WordPress on a VPS, chances are you have your memory limits set as small as you can get away with. This can cause some issues with uploading content, however, as it’s a surprisingly taxing event for some servers to handle. Most experts recommend an absolute minimum of 128 MB for PHP tasks, which is also the default memory limit on Presslabs. Web hosts generally provide this as a base, but you should still check your servers, just in case.
There are multiple ways to see how much memory is allocated for your WordPress tasks. This may be slightly different for every hosting company, but if you’re on cPanel, you can usually go to the software section, click on Select PHP Version, followed by Switch to PHP Options. Halfway down the page is a memory_limit paragraph with a value out to the right. Set it to anything above 128 MB, reboot your server, then try the upload again.
#Contact Your WordPress Host
If all else fails, it’s time to call for help. The above fixes will get rid of the WordPress HTTP error in the vast majority of cases. In fact, the first three tips alone work in most situations. If you’ve tried everything but are still running into issues, it’s time to contact your hosting provider to report the problem and ask for assistance.
#Conclusion
There, that wasn’t so painful, was it? The WordPress HTTP error is often a frustrating and surprising error to encounter. It always seems to happen at the worst of times, too, when you’re uploading a fresh piece of content and getting ready to publish it for the world to see. Fortunately, fixing this problem isn’t all that involved. With the right tricks and tips up your sleeve, you can correct the issue and get back to work in no time.

