We continue our Kubernetes series with a tutorial on how to properly configure the Kubernetes-based MySQL Operator. We’re starting with a tutorial on Microsoft Azure, which is the first part of an extensive step-by-step guide covering various platforms.
In the following lines, you can find simple instructions and examples to help you prepare your cluster environment, install, update and configure all the tools you need and finally create your own cluster.
Firstly, visit the Microsoft Azure Portal.
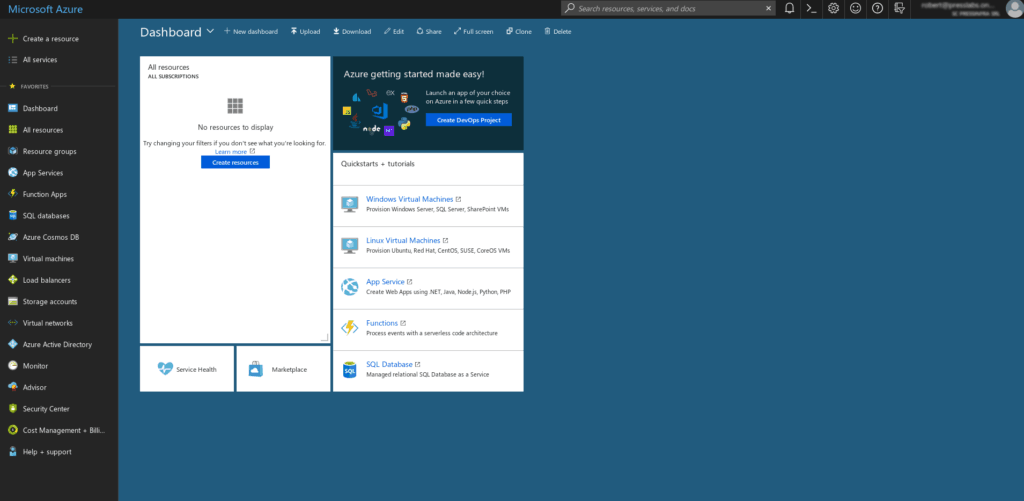
Select the Cloud Shell button in the upper-right corner of the menu.
![]()
If you choose to install and use the CLI locally, this quick start requires that you are already running the Azure CLI version 2.0.4 or later. Run
az --versionto find the version. If you need to install it or upgrade it, go to Install Azure CLI 2.0.
Create a resource group with the
az group createcommand. An Azure resource group is a logical group in which Azure resources are deployed and managed.
$ az group create --name myAKSCluster --location eastus
{
    "id": "/subscriptions/****/resourceGroups/myAKSCluster",
    "location": "eastus",
    "managedBy": null,
    "name": "myAKSCluster",
    "properties": {
        "provisioningState": "Succeeded"
    },
    "tags": null
}
Create a Kubernetes cluster in Azure Container Service with the
az acs createcommand.
$ az aks create --resource-group myAKSCluster --name myAKSCluster --node-count 1 --enable-addons monitoring --generate-ssh-keys
{
...
"location": "eastus",
"name": "myAKSCluster",
"nodeResourceGroup": "MC_myAKSCluster_myAKSCluster_eastus",
"provisioningState": "Succeeded",
"resourceGroup": "myAKSCluster",
“type": "Microsoft.ContainerService/ManagedClusters",
...
}
If you’re using Azure Cloud Shell, kubectl is already installed. If you want to install it locally, use the
az aks install-clicommand.
$ az aks install-cli
To configure kubectl to connect to your Kubernetes cluster, use the
az aks get-credentialscommand. This step downloads credentials and configures the Kubernetes CLI to use them.
$ az aks get-credentials --resource-group myAKSCluster --name myAKSCluster
Merged "myAKSCluster" as current context in /home/user-name/.kube/config
To verify the connection to your cluster, use the
kubectl getcommand to return the list of cluster nodes. It can take a few minutes for the nodes to appear.
$ kubectl get nodes
NAME                       STATUS    ROLES     AGE       VERSION
aks-nodepool1-14445398-0   Ready     agent     13m       v1.9.9
Install helm. If you use the Azure Cloud Shell, the Helm CLI is already installed. For additional installation options go to Install Helm.
To deploy this controller, use the provided helm chart by running:
$ kubectl create serviceaccount -n kube-system tiller
serviceaccount "tiller" created
$ kubectl create clusterrolebinding tiller-crule --clusterrole=cluster-admin --serviceaccount=kube-system:tiller
clusterrolebinding.rbac.authorization.k8s.io "tiller-crule" created
$ helm init --service-account tiller --wait
HELM_HOME has been configured at /home/presslabs/.helm.
Tiller (the Helm server-side component) has been installed into your Kubernetes Cluster.
Please note: by default, Tiller is deployed with an insecure 'allow unauthenticated users' policy.
For more information on securing your installation see: https://docs.helm.sh/using_helm/#securing-your-helm-installation
Happy Helming!
$ helm repo add presslabs https://presslabs.github.io/charts
"presslabs" has been added to your repositories
$ helm install presslabs/mysql-operator --name mysql-operator
NAME:   mysql-operator
LAST DEPLOYED: Tue Aug 14 15:50:42 2018
NAMESPACE: default
STATUS: DEPLOYED
...
For more information about chart values see go to README. This chart will deploy the controller along with an orchestrator cluster.
Before creating a cluster, you need a secret that contains the ROOT_PASSWORD key. An example of this secret can be found at examples/example-cluster-secret.yaml. Create a file named example-cluster-secret.yaml and copy into it the following YAML code:
apiVersion: v1
kind: Secret
metadata:
name: my-secret
type: Opaque
data:
# root password is required to be specified
ROOT_PASSWORD: bm90LXNvLXNlY3VyZQ==
Now, to create a cluster you need just a simple YAML file that defines it (an example can be found at examples/example-cluster.yaml). Create a file named example-cluster.yaml and copy into it the following YAML code:
apiVersion: mysql.presslabs.org/v1alpha1
kind: MysqlCluster
metadata:
name: my-cluster
spec:
replicas: 2
secretName: my-secret
For a more in-depth configuration, check examples.
Deploying a cluster:
$ kubectl apply -f example-cluster-secret.yaml
secret "my-secret" created
$ kubectl apply -f example-cluster.yaml
mysqlcluster.mysql.presslabs.org "my-cluster" created
To list the deployed clusters, use:
$ kubectl get mysql
NAME                       STATUS    ROLES     AGE       VERSION
aks-nodepool1-14445398-0   Ready     agent     13m       v1.9.9
To check cluster state, use:
$ kubectl describe mysql my-cluster
...
Status:
Ready Nodes:             1
Conditions:
Last Transition Time:  2018-08-16T11:28:14Z
Message:               Cluster is not ready.
Reason:                statefulset not ready
Status:                False
Type:                  Ready
...
To connect to the orchestrator dashboard you have to port forward orchestrator port 3000 to your local machine by using:
$ kubectl port-forward mysql-operator-orchestrator-0 3000
Forwarding from 127.0.0.1:3000 -> 3000
Forwarding from [::1]:3000 -> 3000
Type http://localhost:3000 in a browser.
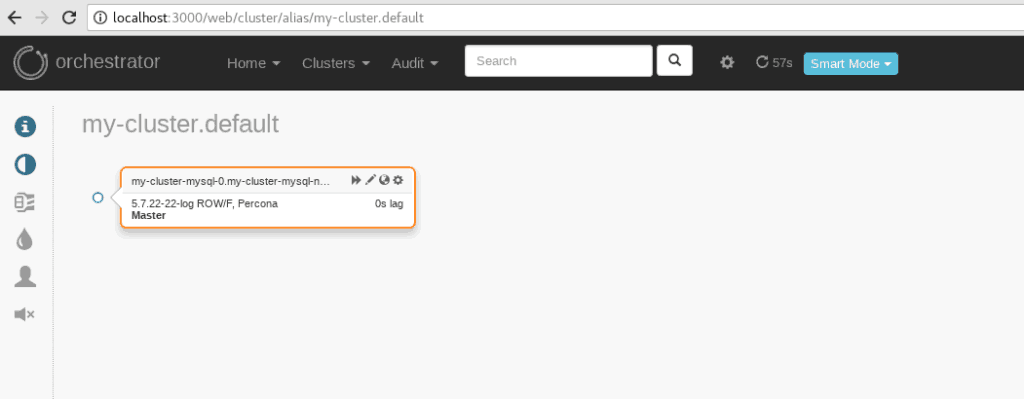
We hope our tutorial was useful enough to get your cluster up and running! You can always give us feedback or contribute to our project directly on GitHub.
Keep an eye on our blog, next week we’ll be back with a Kubernetes MySQL Cluster tutorial for Google Kubernetes Engine!
